

How To Set A Stone In A Ring At Home
Go on upwardly to date with the latest metalsmithing news and release of new jewelry making tutorials

A lot of my tutorials involve prong (claw) settings, then I made this gratuitous setting tutorial as an overview to help my students do setting skills and complete their projects more than easily.
This free tutorial follows the same format equally all my other free and premium tutorials. This gives yous a good insight into the technical teaching methodology.
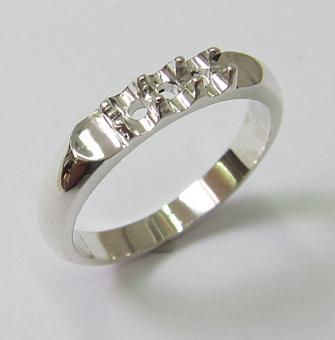

I get-go with the blank ring.
This ring is 4.v mm wide and the stones that are going to be fitted are iii mm in bore.
The stones don't quite fit in between the claws yet.
The rock diameter is three mm and I am using a coloured stone to give a better visual contrast against the silverish metallic.

I utilise a 2 mm threescore° setting burr for this job, because the stones are 3 mm in diameter.
Theoretically, a 3 mm setting burr would be easier because all four claws can exist cutting at once, rather than using a 2 mm burr and cutting the claws one at a time.
However, in practice, claws cut with a big burr tend to exist over cutting, and once cut, leave no room for adjustment.
With a slightly smaller burr than the diameter of the stone, one can go back and exercise some adjustments should the rock not be level.

I get-go cut i side of the claw so that a notch forms. Not too deep, considering otherwise the hook will be weakened.
And not as well shallow, otherwise the girdle of the rock won't lock into the notch.
This is the part that takes a fleck of practice.

This picture shows the notch that is cut to the right depth. One tin see the girdle of the stone will hook nether the top lip of the notch.

All the claws are cut in this fashion. The setting burr leaves a scrap of swarf on each prong and this needs to be removed with a scriber or a apartment graver.

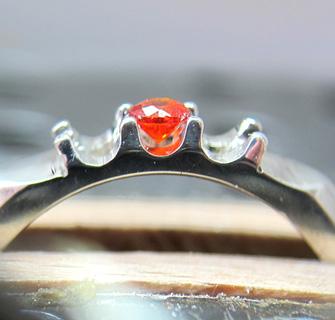
Here the offset stone is fitted into the claws.
Annotation that the tabular array of the stone is about the same top every bit the top of the claws.

Here all three stones are fitted and are nevertheless height and also level.
At kickoff this procedure can be a bit frustrating for a beginner, particularly getting them all the same height.
With practice though, it becomes easier and the bottom line in all jewelry making is do, practice and more practice.

Now the claws are pushed over the stones.
First the ane side and then the other side of a stone.
Information technology is better to push button a trivial class one side and then push a little from the other side and the a chip more on the get-go side.

This moving-picture show is posed showing the brass pusher and the bending of force.
Earlier force is applied, consciously check to see that your pusher is firmly on the claw and also at the correct bending, to avert slipping off.

I make my own brass pushers out of 3 mm brass rod. It is expert practice to make your own pushers, because it allows you to make a pusher for a particular job.
Because the pusher was made for that job, the work is finished off more rapidly and neater, rather that struggling with a pusher that it to large or too small.

The claw pusher is fitted into a mushroom graver handle.

Afterwards the band is polished in the normal mode.
Projects made with Prong Setting
If you take whatever questions or wish to be notified of whatsoever new tutorials that are posted, email me.

Source: https://jewelry-tutorials.com/stone-setting-tutorial-prong-setting.html
0 Response to "How To Set A Stone In A Ring At Home"
Post a Comment